Are you noticing leaks from the bottom of your toilet? Start by locating the source of the leak. First, check the tank, bolts, and gasket where the tank meets the toilet bolt. Look for any cracks in the structure. If not, proceed onto the supply tube. Once you’ve shut off the main valve to prevent water from flowing through the pipe, inspect the line thoroughly. Check for any leaks or drips along the pipe’s body. If you clear both tests, chances are you’ll need a toilet wax ring replacement.
What Is A Toilet Wax Ring?
A wax ring creates a water-tight seal around the toilet and the flooring where it meets the drain. It is one of the essential elements of any bathroom to prevent leaks and ensure good hygiene. Thus, if you’re looking to repair or replace the wax ring, you’ll need to disconnect the toilet from the flooring entirely.


How To Perform A Toilet Wax Ring Replacement?
Fixing a leaking toilet is not as challenging as it seems. You must follow these steps and pay attention to instructions to help make this process quick and easy.
Before any replacement, you must turn off the water supply to the toilet. Whether using the toilet’s shutoff valve or restricting water throughout the house, there must be no water in the toilet during the replacement. Note that the toilet’s valve is on the back, and you need to turn the knob clockwise to stop the water.
Next, drain all the water from the toilet. For this, remove the water tank’s lid and keep flushing. Once this is done, suck out the remaining water using a vacuum or a sponge. Then, disconnect the plumbing line from the tank.
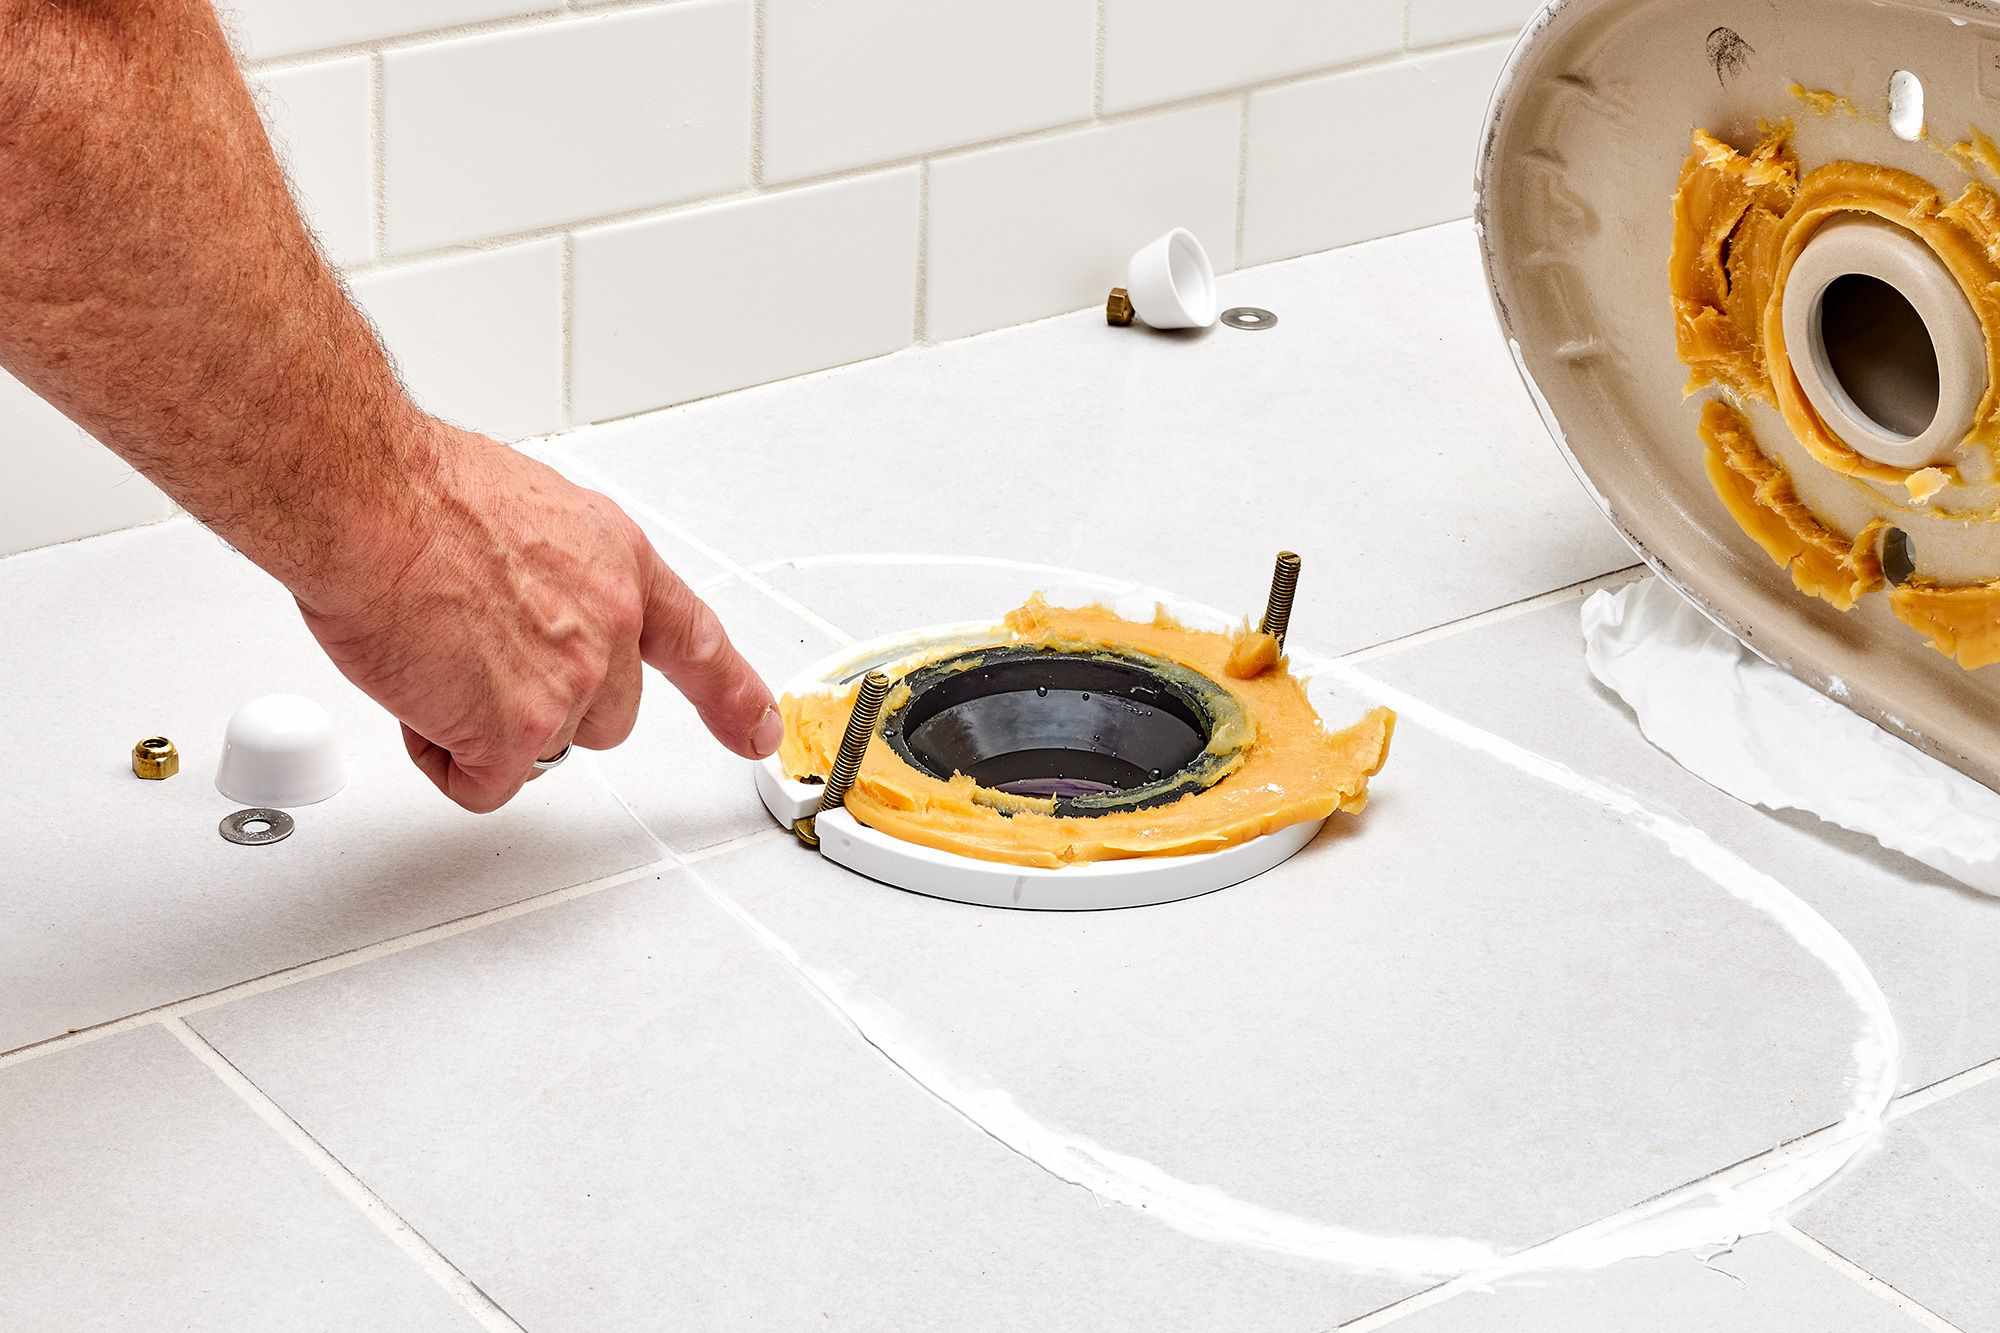
Once you’ve got your toilet dry, it’s time to disconnect it. Pop the lids off the plastic caps encasing the bolts and nuts. Use a screwdriver to remove the bolts holding the toilet to the flange underneath. Then, rock it to break the vacuum seal. Doing this will loosen the toilet and make it ready to move. Lift the toilet and place it on a lint-free towel. Be sure to distribute the weight evenly across the surface to prevent chipping or damage.
Now, you’ll need to scrape off existing wax from the ring. Use a sharp putty knife to break off chunks to hasten the process. Repeat this to the underside of the toilet too. The idea is to get the edges clean and dry to make the new toilet wax ring replacement more effective.
Next, check the flange and look for any cracks or damage. While some corrosion is expected, if the pipe is too degraded, you’ll need to call a professional to replace it. While doing so, it’s good practice to replace old bolts with new ones for lasting results. Once this is done, place the new toilet wax ring on top of the flange and install the toilet.
Reinstallation is probably one of the essential aspects. Lift the toilet from the towel and align it correctly with the holes and bolts. Then, set it down gently and use your body weight to add pressure to create a water-tight seal. Replace the washers, buts, and plastic caps, and you’re done.
Turn on the value and restore the water supply. Let the tank fill up and flush the toilet to check if the replacement has been successful.
Final Words
It is always better to call for a professional expert to get the job done more neatly and appropriately. Call a reliable plumber and get the problem solved faster.